 Q3TOURNEY6: The Very End of You is the final map in Quake III Arena, also known as Across Space. Last stage at the CTF mode is its variant Q3TOURNEY6_CTF: Across Space.
The Map[]
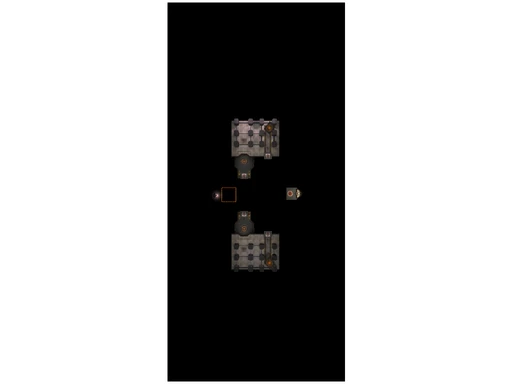
Arena consists of 2 gigantic floating platforms across each other, filled with identical pillars in the formation of 4 rows and 3 lines. Most behind line is by the end of the ledge, while front two lines provide cover from stray fire effectively. Both platforms are tied with an acceleration pad on a smaller platform beneath them, across each other. Each smaller beneath platform leads back to the pillar platform via bounce pad.
At the other end of pillar platforms there are acceleration pads across each other, identically aimed up high to another bounce pad hovering above the across pillar platform. Flung gladiator, will hit the bounce pad above the pillar platform and pounce at the crush trap platform; hovering above and in the middle of both small beneath platforms.
A spiralling spherical shoot switch is hovering just nearby the crush trap platform, ready to clasp and crush or block anyone's access to the trap platform. When shot, floating cyan colored lights will clench closer to the red orb, noticing anyone that platform is closed then flexes back again when it's usable. Crush trap ceiling will be lowered in an instant the button is triggered and stays that way for 5 seconds.
A shuttling small platform accelerates between both rear edge of pillar platforms, by the accelerator pad side of big pillar filled platform. Small shuttling platform visits a smaller teleporter platform in the middle while doing so. This teleporter is a unique one to tele player at various spawn points among the map.
Weapons[]
- Railgun - Located on both sides of the map between pillars.
- BFG10K - Located on the upper platform. Beware the crushing ceiling.
- Rocket Launcher - Located on both sides of the map right beside the launch pads.
Goodies[]
- Megahealth - Sits on a smaller teleporter platform hovering at the middle of the both gigantic platforms. 2 minutes spawn delay. A platform shuttles between the side of gigantic platforms, visits the teleporter platform in the middle while doing so.
- Heavy Armor - Spawns at the middle way of below acceleration pads ahead of Railgun spawn. Exchanges place with Personal Teleporter, once Heavy Armor is taken next spawn will be a PT. It has a respawn delay of 30 seconds, effectively 1 minute 'till you get another Heavy Armor.
- Personal Teleporter - Spawns at the same place as Heavy Armor, exchanges spawns once one is taken. Once PT is taken next spawn will be a Heavy Armor. Respawn delay of 30 seconds, effectively 1 minute 'till you get another PT spawn.
- 50 Health - At the beneath small platform placed under the gigantic pillar platforms across each other, spawns in a tiny space between bounce pad and accel pad.
- 25 Healths - 2 orbs sitting at way behind of Railgun spawn between pillars at each side.
- BFG Ammo - At the middle behind edge of the gigantic platforms between pillars.
Noticeable[]
- This one and its CTF variant are the only Quake 3 stock maps to feature a button-triggered crusher trap.
- All Acceleration pads at the both sides can be used as a cover by crouching behind them.
- Space themed map where long ranged hitscan weapons like Machine Gun and Railgun shines.
- Megahealth can be reached with a good Strafe Jump by timing the shuttling platform as a step stone, otherwise it makes you a rather sitting target. May require player to kickstart the acceleration with a Circle Jump by looking 45-90 degree away from the intended direction to build up speed.
- Megahealth platform teleporter sends anyone at random spawn locations just like Personal Teleporter would do. That makes it pretty possible to Telefrag someone in a crowded match.
Strategy[]
Please see Xaero for Single Player Strategies
In a 1v1 match, this map is a rather pointless as whole game may turn about crouch peeking behind cover. Most behind line of pillars can be still used as a cover against dive-ins or bounce pad visitors. While front pillars and any accelerator pad you may see, provide cover against Railgun fire once you crouch behind them. In a TDM, CTF or FFA; stray rockets will fly by the middle side and at RG spawn so be wary.
In a crowded match reaching at MH-teleporter via strafe jumping would allow you to Telefrag people in a whim if you're any lucky. Holding the control of Megahealth will divert attention away from Heavy Armor ramps once in a while. Trying to stand by the lift, may be dangerous as you'll be quite keen on pushed over by MG fire or Rail. The gap between MH platform and bigger platforms are rather too big to leap with one simple hop. Player must accelerate and time the shuttling platform to be a middle step stone on their double hop strafe jump. Air-steering from the accel pad via a Rocket Jump on it may be possible; but hardly an option since the angle between RL accel pad and MH platform being too narrow, it can be hard to air control the intended deviation with accel pad's skyward boost.
When someone rises for Heavy Armor or Personal Teleporter in the middle, attempt can be shut down by Rail fire or stray rockets can be intimidating. Airborne player can only maintain control by airsteering (plain strafing to sides) after being shot or attempt to dodge it. Pre-firing rockets at middle pillars and ledges where action goes on before lunging across, can block a Railgunner from taking a shot at you.
Railgun and Rocket Launcher are easy to gather weapons, and as you grabbed them you may wanna sink low and chill by the lower small Gold Health platform until Heavy Armor or Personal Teleporter appears; wait until you see someone serious about gathering them or fly to BFG. In a TDM or CTF it will be a Rail-fest as game goes on and teams will only throttle Rocket fire to middle of the platforms. In rare cases some players will try dive-ins to across platform via BFG acceleration pads in order to gather enemy flag.
You can guess there'll be many contestants trying to reach BFG before anyone else notices, but that won't really be a successful attempt at crowded matches more than 4-6 players. Snatching the BFG is not an easy task in a crowded match or when you don't have any advantage over your wounded foe looking for health instead of focusing the important ramps.
To successfully grab BFG without a scratch, it requires player to pre-emptively activate the crush trap so it can't be activated for a while and open its maw as you're about to step on it. After triggering the red button, give a count of 2 seconds to take the accelerator pad. Best bet is taking the RL and standing where you are and at the count of three shoot a few bullets at the button, then as you grab another RL from the spawn step towards the accel pad.
However, this can be countered by sending a rocket at the triggering orb as BFG riser hits the turn from hovering second bounce pad or shooting down the airborne player with a hitscan like MG or RG sending him/her outta flight path. Remember to send a few rockets to the platform you were flinging away from to suppress any shutdown attempt then swap to Railgun mid-air to return fire to anyone may peek.
Having a Personal Teleporter will increase your survival when dashing for the BFG10k. Using PT right away after you lay hands on the BFG10k will get you a quick escape if your foes are way too prideful about abusing crush trap or denying you down with a Rail shot. Remember that if there's no Heavy Armor, people will definitely turn their head to the BFG10k spawn. If you wanna be safe, you must offer a silent deal by leaving Heavy Armor and that's quite a risk if you can't pull MH-strafe jump safely.
Top of short pillars can be used to over see the battle field and perhaps drop a small surprise attack at close battles if you feel like it. With some air steering it's not hard to land on top of pillars by taking below platform bounce pad. Yet that strategy will surely make one hell of an open target of self. Only attempt it when you need to blow out Railgunners from the across low platform and perhaps behind pillars. Standing around on top of pillars for long gets you a railshot to face as you jump aboard.
Being a space themed map, bounce pads can be abused to give a higher lift by Rocket Jumps. By jump diving and sending 1-2 rocket from above gold health platform bounce pad can boost one to the immense heights, that includes the hovering bounce pad above. It's quite possible to Rocket Jump from top of a closeby pillar to reach the second hovering bounce pad that fires player to BFG-crush trap platform. Beware; a low hit to that hover bounce pad after a blast jump will only fling you up to across low platform or into the abyss. Also, by steering and blast jumping from RA-PT accelerator pads you can boost yourself up to BFG-crush trap.
Differentiations[]
In Quake Live, map name changed to Beyond Reality. Map got modified abit, have another medium sized platform in the middle of both gigantic platforms, housing the Quad Damage and replaces the Megahealth platform entirely. That platform placed at the RL side of the pillar platforms, have 4 pillars placed in a large square fashion. Besides keeping Quad, it also have Heavy Machine Gun and two yellow (+25) health orbs. Both smaller beneath platforms have an extra acceleration pad each aimed away at another diagonal bounce pad across the Quad platform. Shuttling platform that visit the MH teleporter also removed and only way to reach Quad platform is by through the accelerator pads.
Besides the Megahealth's removal, Personal Teleporter no longer spawn in the map. Accelerator pads bridging both pillar platforms together now only have Heavy Armor spawn in the middle. Also by the addition of a new platform, it seems like gigantic pillar platforms seem to gain length and ground; platform now covers behind of the back pillars giving more space to recover or juke.
Trivia[]
- It's assumed that this map wasn't the last tourney map that player supposed to face Xaero, it was supposedly a complete but discarded map called PRO-Q3TOURNEY7: Almost Lost. It occurs that dev team decided a through deathmatch would be way too complicated experience for players; given the fuzzy logic of bots and large complexity of map. So, they toned it down by making a CTF gameplay intended map as the last map.